CuidadoCare
Cómo limpiar un disco de vinilo correctamenteHow to clean a vinyl record properly
Una guía práctica para retirar polvo y suciedad sin dañar el surco.A practical guide to removing dust and dirt without damaging the groove.
Una limpieza segura empieza con una decisión sencilla: retirar primero lo que está suelto y reservar la humedad para la suciedad que realmente lo necesita. El objetivo no es dejar el disco “brillante”, sino reducir polvo, residuos y estática sin añadir una nueva capa de contaminación.
Empieza por el polvo suelto
Coloca el disco en la tornamesa detenida o sobre una superficie limpia y estable. Sujétalo por los bordes y la zona de la etiqueta; evita tocar el área grabada. Antes de aplicar presión o líquido, permite que un cepillo de fibra de carbono limpio recoja las partículas superficiales.
Apoya las fibras con suavidad mientras el disco gira una o dos vueltas. Después desplaza el cepillo hacia el borde exterior para sacar el polvo, en lugar de concentrarlo en otro punto del surco. No se trata de “tallar”: demasiada presión dobla las fibras y reduce su capacidad de entrar ligeramente en el surco.
Dos tareas, dos cepillos distintos
Dentro de una rutina en seco, estos accesorios de Boundless Audio son ejemplos claros de herramientas con funciones separadas: uno trabaja sobre la superficie del disco y el otro únicamente sobre la aguja.
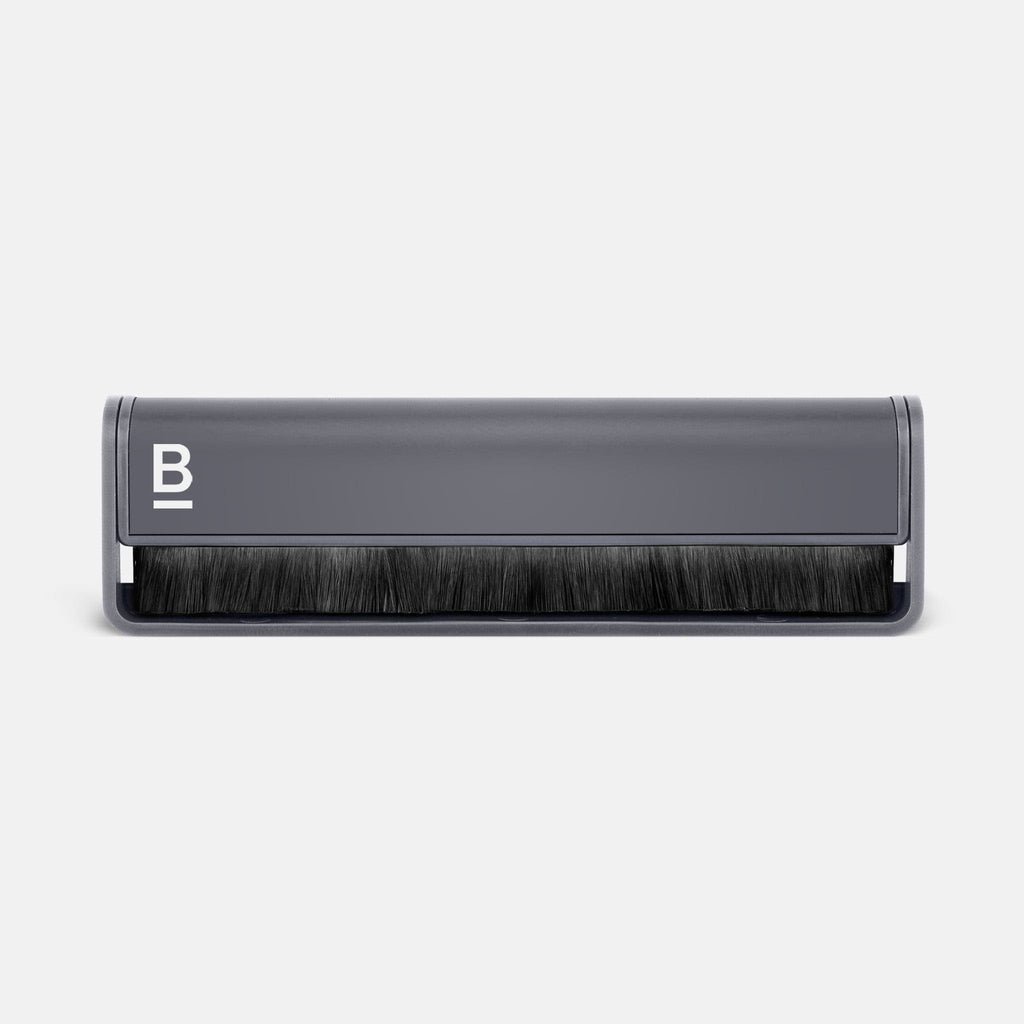
Carbon Fiber Record Cleaning Brush
Para retirar polvo superficial antes de escuchar. Sus dos filas de fibra de carbono se apoyan con presión mínima y se usan sin líquido; la carcasa de aluminio forma parte del método antiestático indicado por la marca.
Ver producto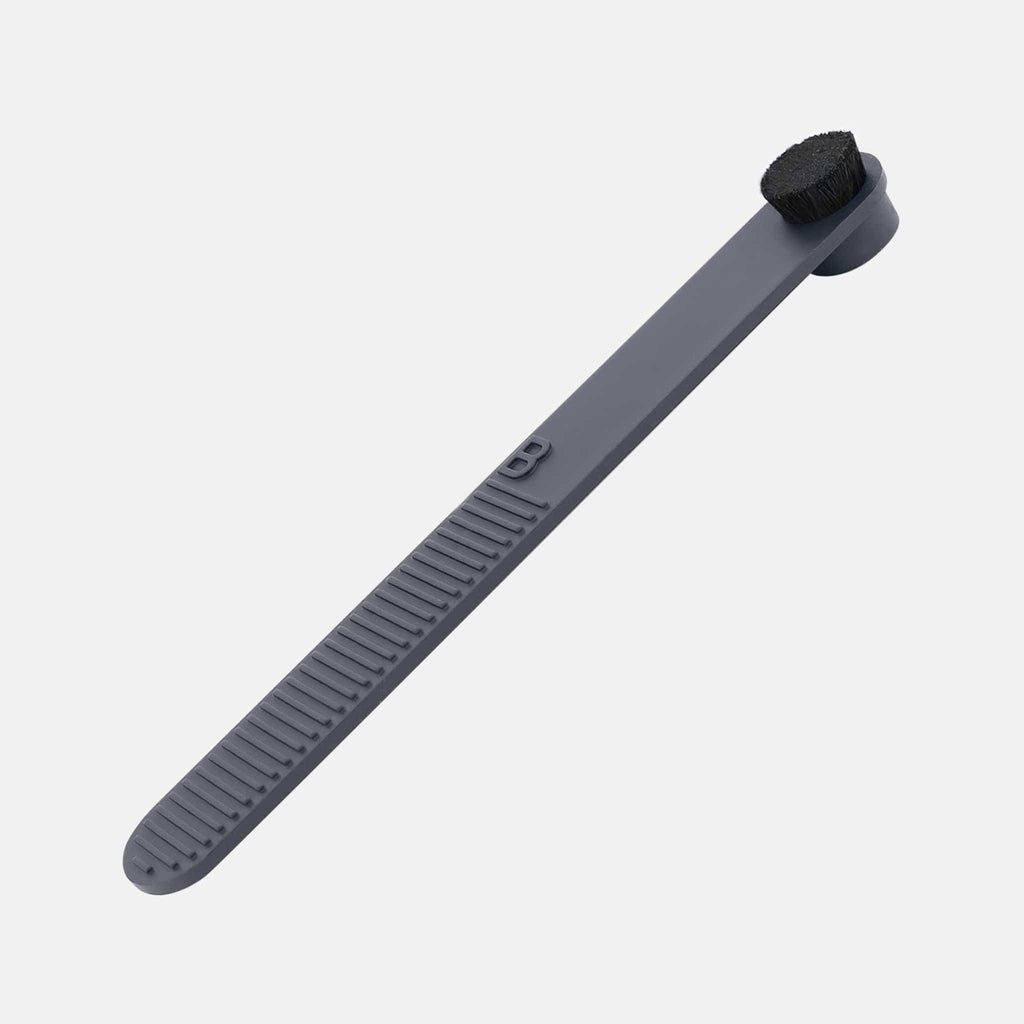
Stylus Cleaning Brush
Para retirar fibras visibles de la aguja con mayor control. Se usa en seco, con un movimiento suave de atrás hacia delante y respetando siempre las instrucciones de la cápsula.
Ver productoEstas herramientas sirven para mantenimiento ligero. No eliminan huellas, grasa o residuos adheridos y no sustituyen una limpieza húmeda cuando ésta está justificada. Verifica disponibilidad y envío para tu región.
Limpieza en seco y limpieza húmeda
La limpieza en seco sirve para polvo superficial. Si hay huellas, película grasa, residuos adheridos o ruido persistente que no corresponde al desgaste, conviene una limpieza húmeda. Utiliza una solución formulada específicamente para discos de vinilo y sigue su dilución e instrucciones; una máquina de limpieza con aspiración puede ser útil para colecciones grandes, pero no es indispensable para una rutina doméstica cuidadosa.
Aplica el líquido sin mojar la etiqueta y distribúyelo con un aplicador limpio siguiendo el recorrido circular del surco. Evita movimientos bruscos de lado a lado y nunca uses el mismo paño para discos limpios y muy sucios. Si el fabricante del sistema exige enjuague, usa el agua indicada por ese sistema para no dejar minerales o surfactantes.
Qué productos conviene evitar
- Limpiavidrios, cloro y limpiadores multiusos.
- Detergentes perfumados o productos que dejan abrillantadores.
- Alcohol doméstico sin conocer concentración, pureza y compatibilidad con la fórmula.
- Papel absorbente áspero, servilletas y paños con suavizante.
- Mezclas caseras aplicadas sin medir o sin un enjuague controlado.
Algunas soluciones comerciales incluyen alcohol en concentraciones controladas; eso no vuelve intercambiable cualquier alcohol doméstico. También existen discos antiguos de materiales distintos al PVC que requieren tratamiento especializado. Si no conoces el formato o ves grietas, desprendimientos o moho, detén la limpieza y consulta a un conservador.
Secado, manipulación y funda
El disco debe secarse por completo al aire en un soporte limpio, o mediante el sistema de aspiración indicado por la máquina. No lo reproduzcas húmedo y no lo devuelvas a una funda con polvo. Después de una limpieza profunda, una funda interior limpia y estable evita reintroducir buena parte de lo que acabas de retirar.
Para guardar el disco, tómalo por el borde y la etiqueta. La grasa de los dedos retiene partículas y puede quedar dentro del surco. No hace falta lavar cada disco antes de cada escucha: limpia en húmedo cuando exista suciedad visible o un motivo claro, y mantén una rutina ligera de cepillado.
No olvides la aguja
Una aguja con fibras acumuladas puede devolver suciedad al surco y perder seguimiento. Apaga la tornamesa y límpiala con la herramienta y en la dirección recomendadas por el fabricante de la cápsula, normalmente de atrás hacia delante. Nunca empujes lateralmente el cantilever y evita líquidos no autorizados. Revisa la aguja con buena luz con la frecuencia que pida tu entorno: una casa con mascotas o ventanas abiertas suele acumular polvo más rápido.
Safe cleaning begins with a simple decision: remove loose material first and reserve moisture for dirt that actually requires it. The goal is not to make a record look “shiny,” but to reduce dust, residue and static without adding another contaminating layer.
Start with loose dust
Place the record on a stopped turntable or a clean, stable surface. Hold it by the edge and label area; avoid touching the playing surface. Before adding pressure or fluid, let a clean carbon-fibre brush collect loose particles.
Rest the fibres lightly on the surface for one or two rotations. Then move the brush toward the outer edge so dust leaves the record rather than gathering elsewhere in the groove. Do not scrub: excessive pressure bends the fibres and reduces their effectiveness.
Two jobs, two different brushes
Within a dry-care routine, these Boundless Audio accessories are clear examples of tools with separate roles: one works on the record surface and the other only on the stylus.
Carbon Fiber Record Cleaning Brush
For removing loose surface dust before listening. Its two rows of carbon fibre need minimal pressure and no liquid; the aluminium body is part of the brand's stated antistatic method.
View productStylus Cleaning Brush
For removing visible fibres from the stylus with greater control. Use it dry, moving gently from back to front and always following the cartridge maker's instructions.
View productThese are light-maintenance tools. They do not remove fingerprints, oil or adhered residue, and they do not replace wet cleaning when it is justified. Check availability and shipping for your region.
Dry cleaning and wet cleaning
Dry cleaning is for surface dust. Fingerprints, oily films, adhered residue or persistent noise unrelated to wear can justify wet cleaning. Use a solution specifically formulated for vinyl records and follow its dilution and handling instructions. A vacuum record-cleaning machine can help with a large collection, but careful home cleaning does not require one.
Keep fluid away from the label and spread it with a clean applicator along the circular path of the groove. Avoid aggressive side-to-side motion and never use the same cloth for clean and heavily soiled records. If the system calls for rinsing, use the water specified by its maker to avoid mineral or surfactant residue.
Products to avoid
- Window cleaner, bleach and general-purpose household cleaners.
- Perfumed detergents or products that leave polishing agents.
- Household alcohol when its concentration, purity and formulation are unknown.
- Rough paper towels, tissues and cloths treated with fabric softener.
- Unmeasured home mixtures without a controlled rinse.
Some commercial fluids use alcohol at a controlled concentration; that does not make arbitrary household alcohol interchangeable. Older discs may also use materials other than PVC and require specialist treatment. If the format is uncertain or you see cracks, flaking or mould, stop and consult a conservator.
Drying, handling and sleeves
Air-dry the record completely in a clean rack, or use the vacuum cycle specified by the machine. Never play it wet or return it to a dusty sleeve. After deeper cleaning, a clean, stable inner sleeve helps keep much of the removed debris from returning.
Handle the record by the edge and label. Skin oils hold particles and can settle into the groove. A wet wash is not necessary before every play: use it when there is visible contamination or another clear reason, then rely on light brushing for routine care.
Do not forget the stylus
A stylus carrying fibres can return debris to the groove and track poorly. Switch the turntable off and clean the stylus with the tool and direction specified by the cartridge maker, commonly back to front. Never push the cantilever sideways or use an unauthorised fluid. Inspect it in good light as often as your environment requires; pets and open windows generally mean faster dust accumulation.